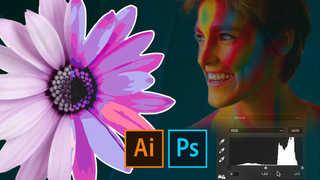
Vectorize Anything with Image Trace
What would your digital portfolio be without vectors?
In this course, I will share with you my best tips for one of the most valuable skills as a digital artist, vectorizing images.
I use vectors all the time in my art. Image trace has been a great tool to create my own, but when I started, I was getting terrible results..
The pen tool is a difficult thing to master, and takes a lot of time to use, even when you are good.
So I was stuck with Image Trace for complex images, small or pixelated jpegs, and big images took forever between edits.
I experimented making some quick edits in Photoshop. It instantly got better. I was so stoked to be able to find elements and keep them in this valuable format.
I looked online, and no one was teaching this concept, so I wanted to share it. This skill seriously helped me, and I hope it helps you. I am stoked for your art and your excitement creating vectors you can use now and for future projects for years to come!
Here's a what we will cover in this course:
- Diving Into Image Trace
We’ll review every option in the Image Trace panel while playing around with an orange.
- Vectorizing Photos Pre-Edits
Once we understand what we are looking for in a photo, we step into PS and make the necessary changes. We will go over making these changes with adjustment layers, and making them with Camera Raw Filters.
- Vectorizing Photos with Image Trace
We will jump into making our image into a vector, and getting a subject out of our photo.
- Vectorizing Drawings Pre-Edits
Marker drawings were made to be vectorized!! Chances are, you may not even need to pre-edit the images, but just in case we will learn how to make sure that image trace can do its best job.
- Vectorizing Drawings with Image Trace
We will turn a marker drawing into a finished vector. Once we have this one-color vector, we can replace the fill with anything we desire!
- Vectorizing Found Elements
In this lesson, we will quickly pre-edit some small images we find online, then make them high-quality vectors.
In Summary,
You will learn to get high quality vectors from any image you have!
I'll see you soon,
- Douglas
FAQs About "Vectorize Anything with Image Trace"
About
Elektev is on a mission to organize educational content on the Internet and make it easily accessible. Elektev provides users with online course details, reviews and prices on courses aggregated from multiple online education providers.
DISCLOSURE: This page may contain affiliate links, meaning when you click the links and make a purchase, we receive a commission.